
As a reference to the less-known invention of first rubber balloon by Michael Faraday, otherwise known for his contributions to the study of electromagnetism and electrochemistry, I named the project in his name. Realization started in autumn 2015 and with some bigger delays on 5/8/2017 it resulted in successful mission. During the realization I was inspired by several web pages, so let this article serve to share information and experiences in some similar projects as well.
Conception
As a hobby project with the uncertain outcome the low-cost DIY attitude has been chosen. The goal was (apart the fun) to find out accessible height for this types of equipment and to measure the behaviour of chosen technology in environment of the middle stratosphere.
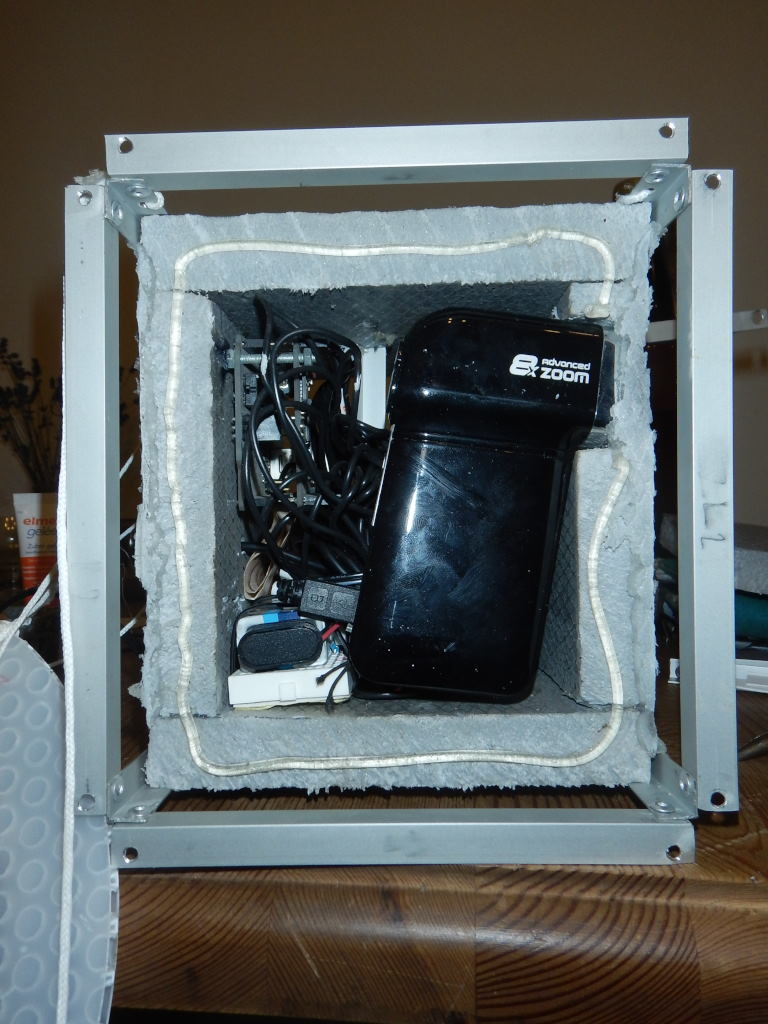
During the flight it is required to measure external pressure, sets of temperatures and to also take some pictures. Therefore the console is equipped with the data logger, collecting data from one pressure sensor and three temperature sensors. As it turned out, cheap camera is not ideal. Some more resistant to environment would be better.
To indicate position after landing the GPS tracker is installed. Communication via GSM sim card.
Realization
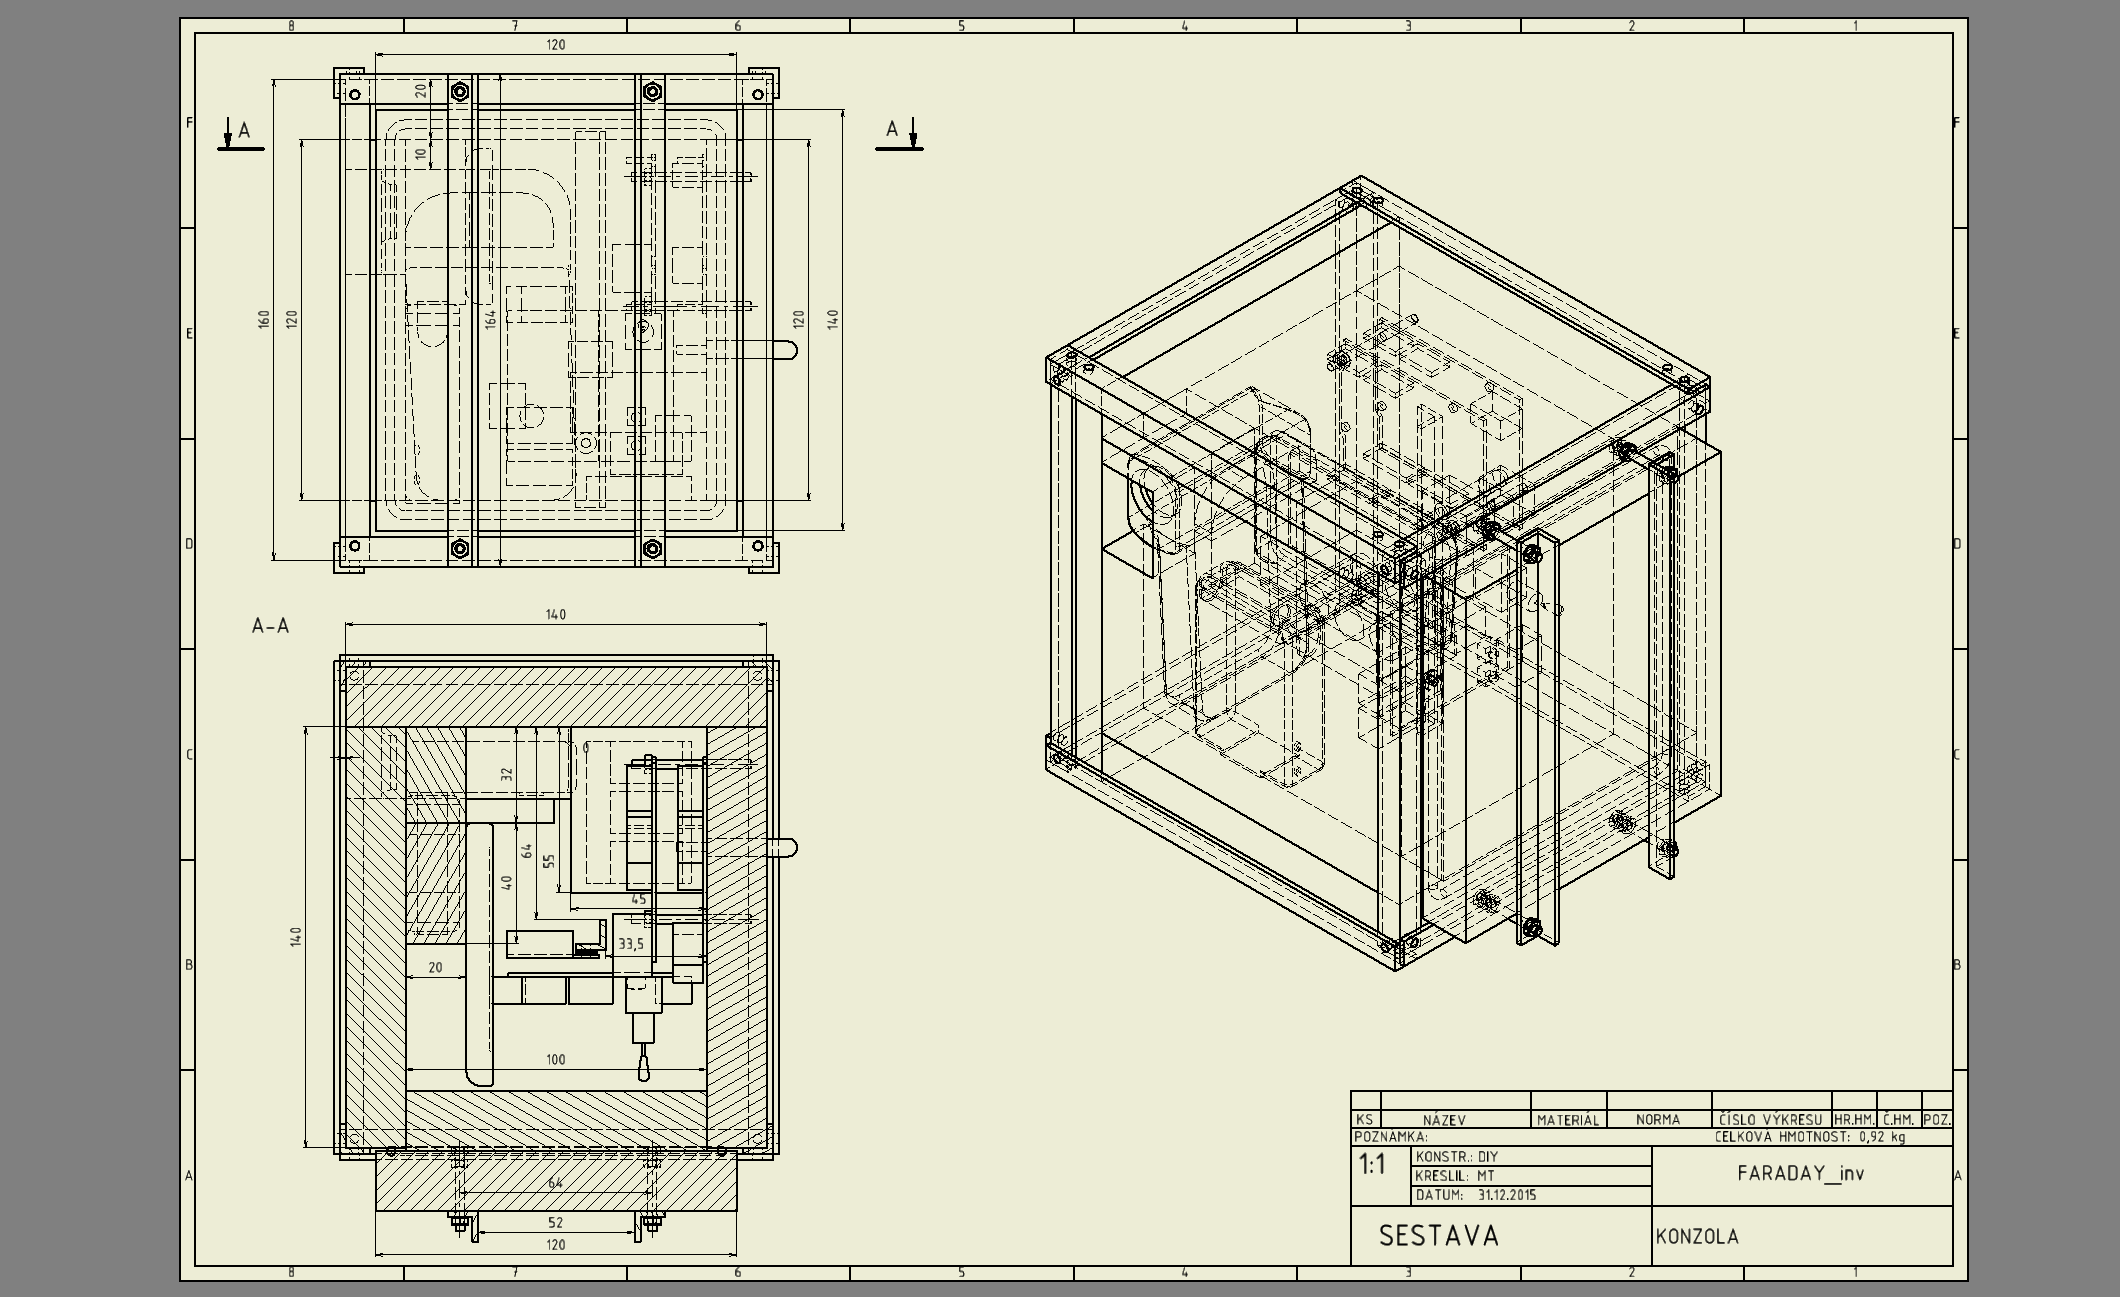
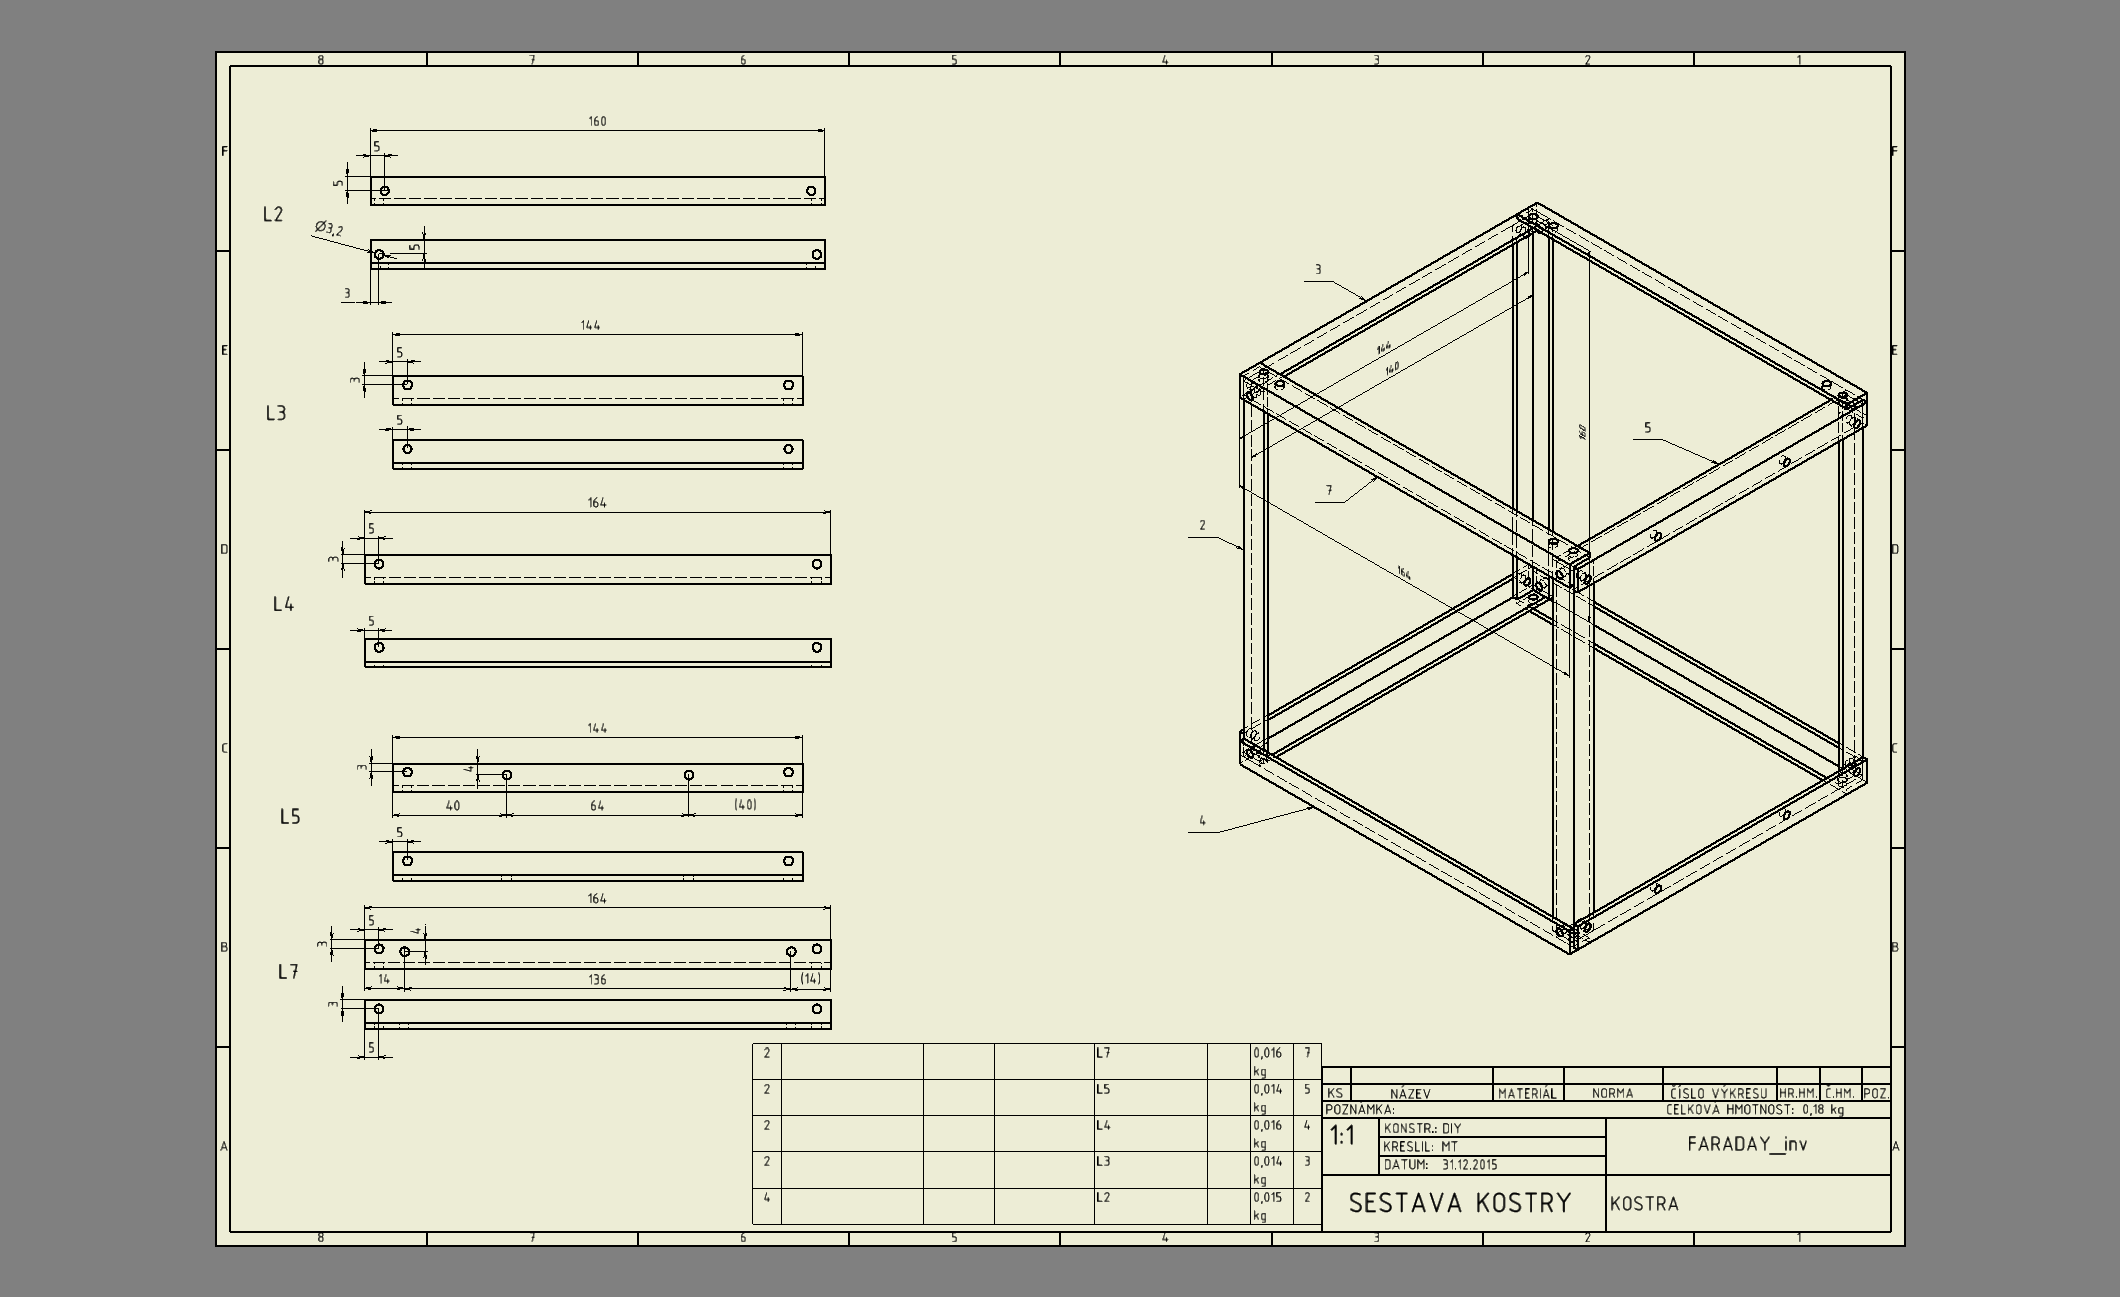
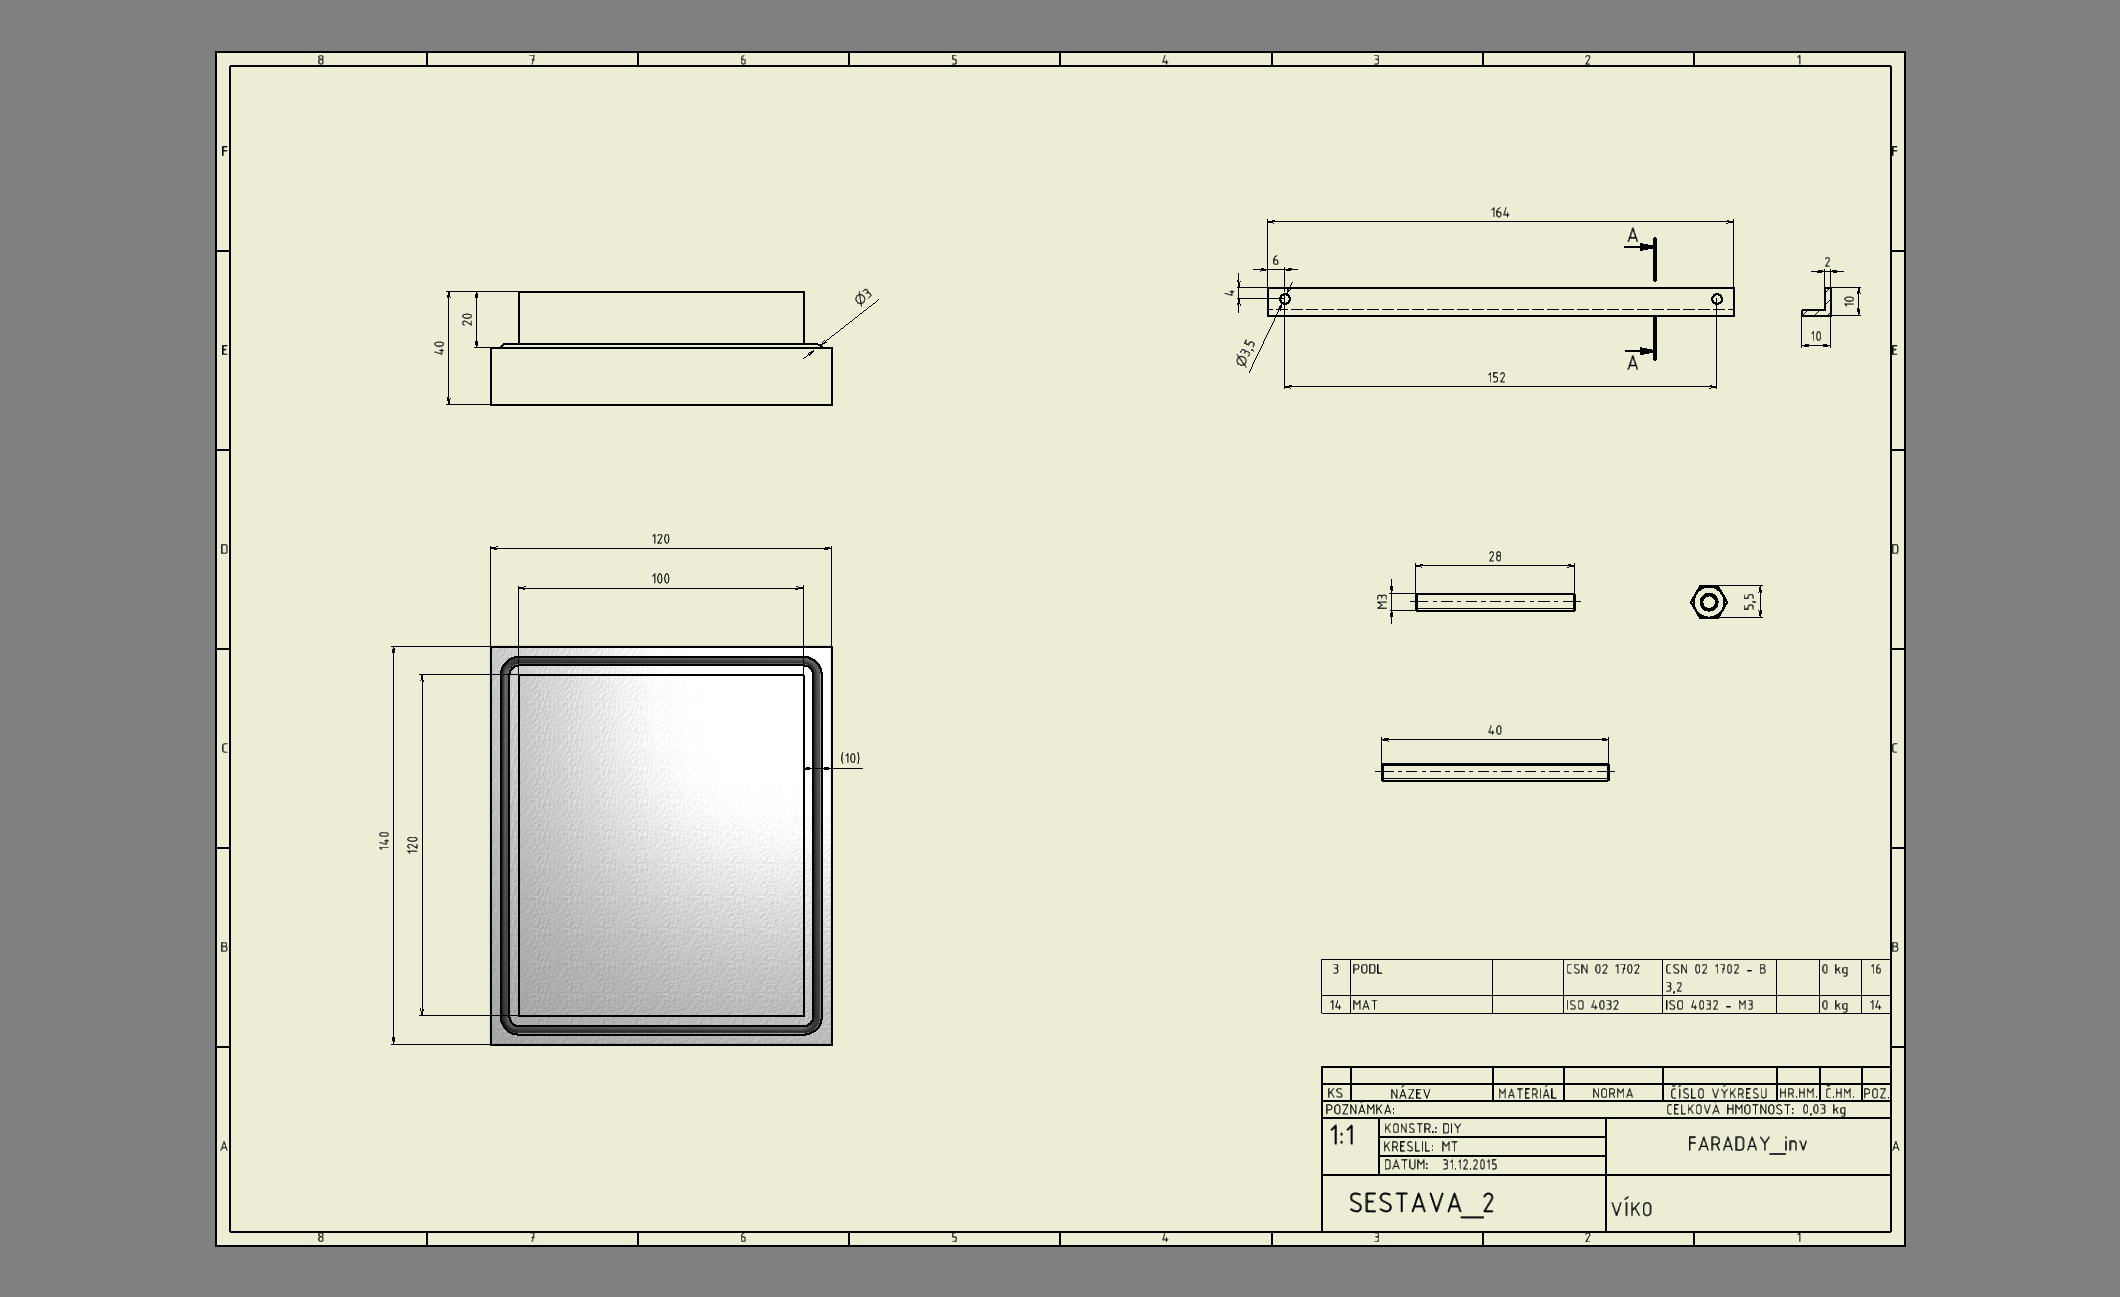
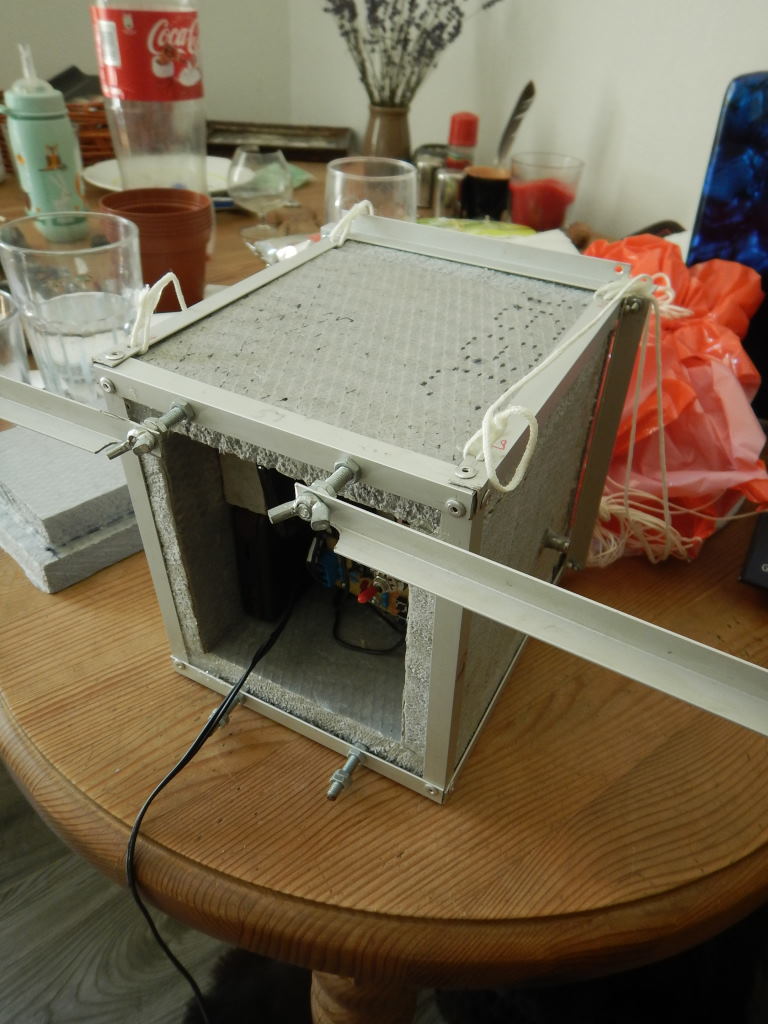
For construction of cubical, aluminium L-profiles have been used, riveted together. Walls have been made of extruded polystyrene.
Total weight of console and payload m=0,92kg
PARTS
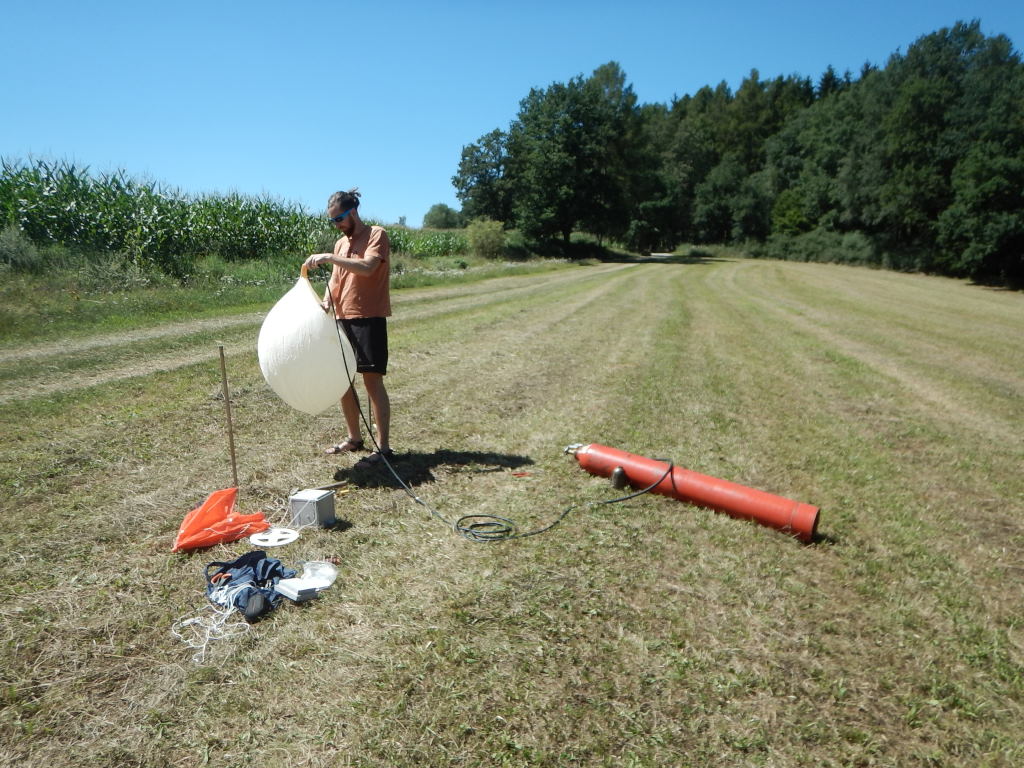
Balloon
Ordered from
| weigth | 300 g |
| gross lift | 2.33 kg |
| inflation volume | 2.1 m3 |
| inflation diameter | 1.6 m |
| ascent rate | 400 m/min |
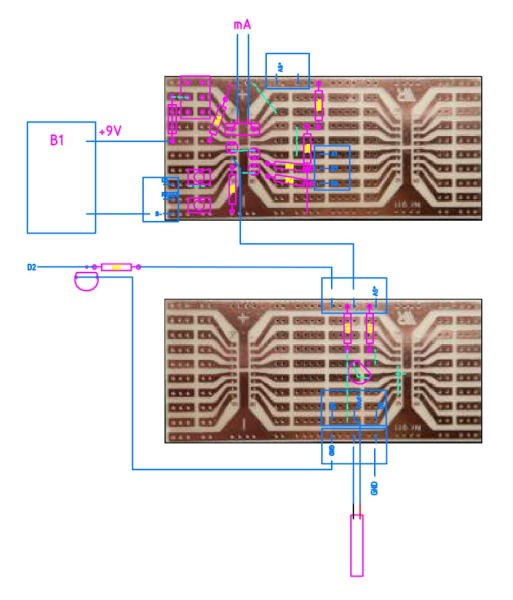
Data logger
Control board with ARDUINO UNO
ETHERNET shield added for saving log file to SD card.

Onto control board is connected power supply. One LED shows voltage presence. Other two is used with control buttons for program status. Controller switching the second and third LED when the program is running, blink LED while writing to SD, blink several time fast when the erasing memory button is pressed.
With I=226mA gives input power P=U.I=8,5.0,226=1,9W

I have chosen Lithium battery for good range of working temperatures. A discharge characteristic shows discharging curve for constant load of I=115mA.
| Westinghouse CR9V |  |
| capacity | 1200 mAh @ 1mA |
| working temperature | -40°C .. +60°C |
// projekt faraday_v7.2
<OPEN>
#include <BMP180.h>
#include <Wire.h>
#include <SPI.h>
#include <SD.h>
#include <OneWire.h>
#include <DallasTemperature.h>

BMP180 barometer;
double seaLevelPressure = 101325;

//definice pinu teplotnich cidel
#define T2 2
#define T3 3
#define T9 9

OneWire T2val(T2);
OneWire T3val(T3);
OneWire T9val(T9);


DallasTemperature sensor1(&T2val);
DallasTemperature sensor2(&T3val);
DallasTemperature sensor3(&T9val);

// SD chip setup
const int chipSD = 4;

// promenne

int wrtdelay = 250; //prodleni zapisu

// definice pinu
int L7 = 7; //LED7
int L8 = 8; //LED8
int S1 = 5; //tlacitko S1 - vymaz log souboru

// alokace
int S1stat = 0;
int dat1 = 0; //krok zapisu
int dat2 = 0; //cas

void setup() {

Serial.begin(9600);

sensor1.begin();
 sensor2.begin();
 sensor3.begin();

Wire.begin();

barometer = BMP180();


if(barometer.EnsureConnected())
 {
 Serial.println("Connected to BMP180.");
 barometer.SoftReset();
 barometer.Initialize();
 }
 else
 {
 Serial.println("No sensor found_BMP180");
 }


// definice I/O
 pinMode(L7, OUTPUT);
 pinMode(L8, OUTPUT);
 pinMode(S1, INPUT);
 pinMode(T2, INPUT);
 pinMode(T3, INPUT);
 pinMode(T9, INPUT);


//nacteni SD
 Serial.println("nacteni SD ...");

if (!SD.begin(chipSD)) {
 Serial.println("err SD nacteni");
 return;
 }


}

void loop() {

// smazani datalog souboru
S1stat = digitalRead(S1);
if (S1stat == HIGH) {
SD.remove("data_ard.log");
Serial.println("soubor data_ard.log byl smazan");
for (int x = 0; x < 40; x++) {
digitalWrite(L8, HIGH);
delay(20);
digitalWrite(L8, LOW);
delay(40);
}

dat1 = 0;
}

//progstat1
 digitalWrite(L7, HIGH);

//pocitani casu
 dat1 = dat1 + 1;
 dat2 = millis() / 1000;


// zapis na SD
 File datalog = SD.open("data_ard.log", FILE_WRITE);

// analog vstupy
double U1 = analogRead(1);

double U1V= U1*(1.0/106.0);

// data z teplotnich cidel
 sensor1.requestTemperatures();
 sensor2.requestTemperatures();
 sensor3.requestTemperatures();

double currentPressure = barometer.GetPressure();
 double altitude = barometer.GetAltitude(seaLevelPressure);


if (datalog) {
 digitalWrite(L8, HIGH);
 datalog.print(dat1); datalog.print(","); datalog.print(dat2); datalog.print(",");
 datalog.print(sensor1.getTempCByIndex(0)); datalog.print(",");
 datalog.print(sensor2.getTempCByIndex(0)); datalog.print(",");
 datalog.print(sensor3.getTempCByIndex(0)); datalog.print(",");

datalog.print(altitude);datalog.print(",");
 datalog.print(currentPressure); datalog.print(",");


datalog.print(U1V);

 datalog.println('/n');
 datalog.close();

// prodleni zapisu
 delay(wrtdelay / 2);

// progstat2

digitalWrite(L8, LOW);

// prodleni zapisu
 delay(wrtdelay / 2);


Serial.print(dat1); Serial.print(";"); Serial.print(dat2); Serial.print(";");


Serial.print(sensor1.getTempCByIndex(0)); Serial.print(";");
 Serial.print(sensor2.getTempCByIndex(0)); Serial.print(";");
 Serial.print(sensor3.getTempCByIndex(0)); Serial.print(";");

Serial.print(altitude);Serial.print(";");
 Serial.print(currentPressure);;Serial.print(";");


Serial.print(U1V);

Serial.println("");
 }


else {
 Serial.println("err SD zapis");
 digitalWrite(L8, HIGH);
 }


// konec smycky
}
>CLOSE<
Pressure sensor
| BOSH BMP180 |  |
| pressure range | 30 .. 110 kPa |
| supply | 3.6V (from arduino) |
| protocol | I2C |
Although the sensor range is from 30 kPa (+9000m), normally can operates below. At least to achieved altitude.
Nice advantage is communication via I2C protocol, which has digital output in Pa, but also calculated absolute altitude.
Temperature sensors
| DALLAS DS18S20 | |
| range | -55 .. +125 °C |
| supply | 5V (arduino) |
| protocol | I2C |
There are 3 temperature sensors used. 2 standard – on control board and on battery, one encapsulated sensor outside.
Supply is fed from 5V arduino output to sensor external pin directly, to communication link through 4.7k resistor.
GPS/GSM tracker
| TK106 |  |
| supply | 3.7 V |
| battery | 1200 mAh Li-ion |
Gas

| filling gas | Hydrogen 3.0 |
| gas cylinder | 40 l |
| filling pressure | 150 bar |
| reduction valve output pressure | 0 .. 10 bar |
It gives me more sense to use Hydrogen as filling gas, rather than Helium. It is cheaper and has got lower atomic number. Mind the open fire only.
During inflation output pressure was reduced slightly above the atmospheric, thus filling rate could be slow.
Mission
Trajectory precalculation
Can be easily done on the Wyoming university web site for trajectory forecast:
http://weather.uwyo.edu/upperair/balloon_traj.html
Weather conditions
| air temperature | 33 °C |
| barometric pressure | 96970 Pa |
Landing coordinates
Flight range was 109,5 km from take off point. Assumed calculated landing point was 26,5 km away, so I find
the precalculation quite accurate. Azimuth error was 13°0′.

Measured data
| altitude at burst | H_{max}=21597m | |
| minimal pressure | p_{min}=3030Pa | |
| ascent rate | v=345m/min | |
| flight time | ascending | 70min |
| descending | 49min | |
| total | 119min | |
| data logger operation time | 184min | |
| number of records | 4048 |

graph H,p = f (t)

graph H = f (T)
Data postprocesing
Signal filtering and graph printing has been done in Matlab. Structure of log file is CSV.
Sensors, especially temperature sensors, give a peak nonreal value occasionally. Therefore 1-D median filter has been applied to suppress these singular values.
log_prnt.m
<OPEN>
clc; clear all;
% 1 2 3 4 5 6 7 8
% iterace, cas, T2(bat), T3(board), T9(out), H, p, Unap

Mp = csvread('DATA_ARD.LOG');

M = medfilt1(Mp,3);

figure(1)
[hAx,hLine1,hLine2]=plotyy(M(:,2),M(:,6),M(:,2),M(:,7)); grid on; xlabel('t [s]');
ylabel(hAx(1),'H [m]'); ylabel(hAx(2),'p [Pa]');
xlim(hAx(1),[0,8e3]); xlim(hAx(2),[0,8e3]);
ylim(hAx(1),[0,25e3]); ylim(hAx(2),[0,1e5]);
set(hAx(1),'YTick',[0:5e3:25e3]);set(hAx(2),'YTick',[0:2e4:1e5]);

figure(2)
plot(M(:,3),M(:,6),M(:,4),M(:,6),M(:,5),M(:,6));
xlabel('T[°]');ylabel('H [m]');
legend('battery','board','outside');
ylim([0,25e3]);
set(gca,'YTick',[0:5e3:25e3]);
grid on
>CLOSE<
Conclusion
Lower temperature above 10 km has been assumed. Regarding the International standard atmosphere model has been expected values around -50°C. The lowest measured temperature was -24°C. So There is a probability of measurement error of external temperature. The error could be caused by influencing the inside cubical temperature or warming the sensor by its internal resistance.
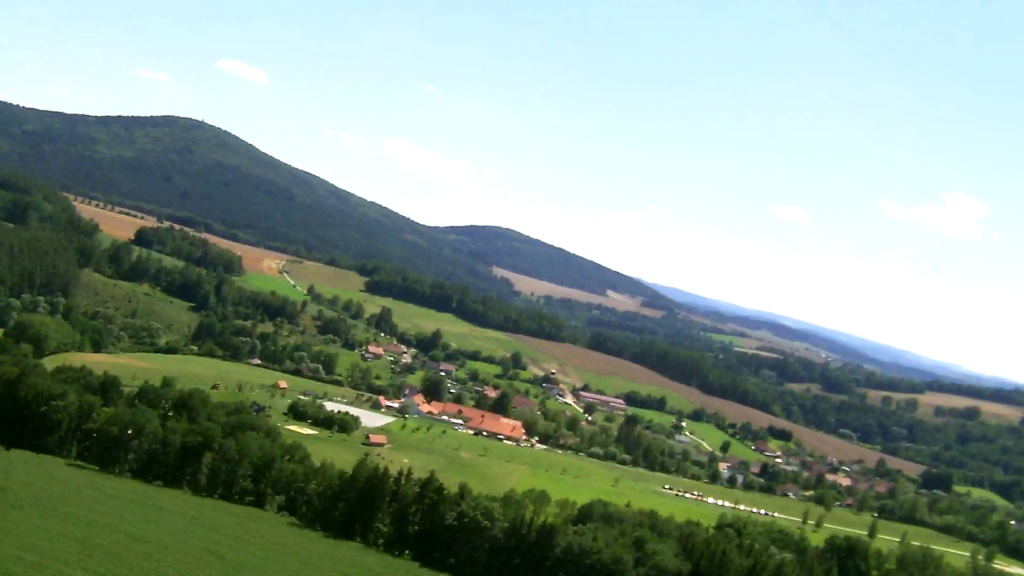
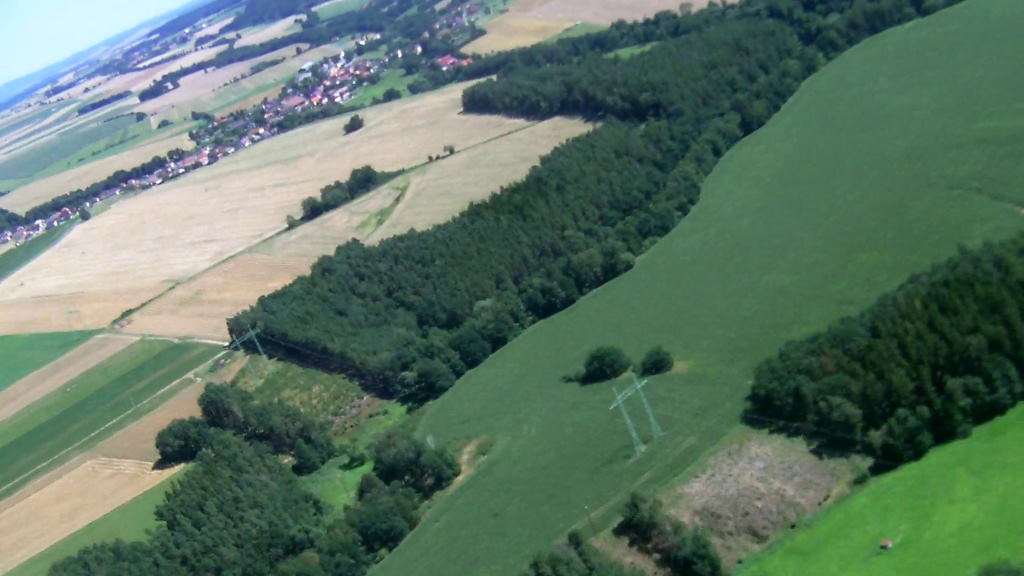
The landing area was fortunately open field with practically zero barriers, so the console with parachute could be clearly seen from longer distance. On the other hand, there was a quite big chance for the balloon to land in nearby full-grown corn field where would be really tricky to find it. For these purpose would be good to equip the console with some kind of sound generator to locate it easily.
On altitude course could be seen that the parachute, just before the landing, catches a thermals for a short time. At time 7000 s it lifts the parachute by 57m from 1443m to 1500m.


Hello there,
My name is Aly and I would like to know if you would have any interest to have your website here at g6.cz promoted as a resource on our blog alychidesign.com ?
We are in the midst of updating our broken link resources to include current and up to date resources for our readers. Our resource links are manually approved allowing us to mark a link as a do-follow link as well
.
If you may be interested please in being included as a resource on our blog, please let me know.
Thanks,
Aly